
Getting to know Android (Part 2) - Setting up your testing environment
As we previously referenced, in this second part series we’re going to show you how to setup a testing environment for running android applications. For testing purposes we are going to use a virtual environment, but you can use a real phone. If you are trying to use a real phone much will be the same with one exception, the creation of the virtual android phone.
3. Setting up the testing environment
We are going to split the installation of the testing lab in parts for easy understanding and better debugging if any errors appear. Also, we are using the latest Ubuntu 13.10 (64 bits) as our Operating System. If you need help installing Ubuntu, there are many useful site to walk you through the process.
3.1- Setting up Java
Once the machine is created, the first you will need to do is install Java. You can chose to install the official JDK from Oracle or the OpenJDK. for our series we will install the OpenJDK.
First up download and install Java through apt-get:
$ sudo apt-get install openjdk-7-jre openjdk-7-jdk
To confirm if the installation was successful we should get an output like the following:
$ java -version
java version "1.7.021"
OpenJDK Runtime Environment (IcedTea 2.3.9) (7u21-2.3.9-1ubuntu1)
OpenJDK 64-Bit Server VM (build 23.7-b01, mixed mode)
$ javac -version
javac 1.7.021
Optional: For ease of use, let’s set our JAVA_HOME environment variable.
$ sudo nano /etc/environment
And add the following line, and then save the file:
JAVA_HOME="/usr/lib/jvm/java-1.7.0-openjdk-amd64"
3.2- Setting up Android SDK
Now that we have Java installed it’s time to install the Android SDK and it can be found here. The Android SDK provides you the API libraries and developer tools necessary to build, test, and debug apps for Android. There are two versions that you can download, the SDK only or the ADT Bundle. We recommend you to download the ADT Bundle because it comes with most of the needed tools pre-set. It contains:
- Eclipse + ADT plugin;
- Android SDK Tools;
- Android Platform-tools;
- The latest Android platform;
- The latest Android system image for the emulator.
Download it to a folder of your choosing. Then open a terminal and navigate to the folder you downloaded the ADT Bundle and unpack it.
$ unzip adt-bundle-linux-x86_64-20130219.zip
Now, we will run the android file (this file is located under sdk/tools/ directory). This will launch the Android SDK and AVD Manager. The AVD Manager provides a graphical user interface in which you can create and manage Android Virtual Devices (AVDs), which are required by the Android Emulator.
$ ./android
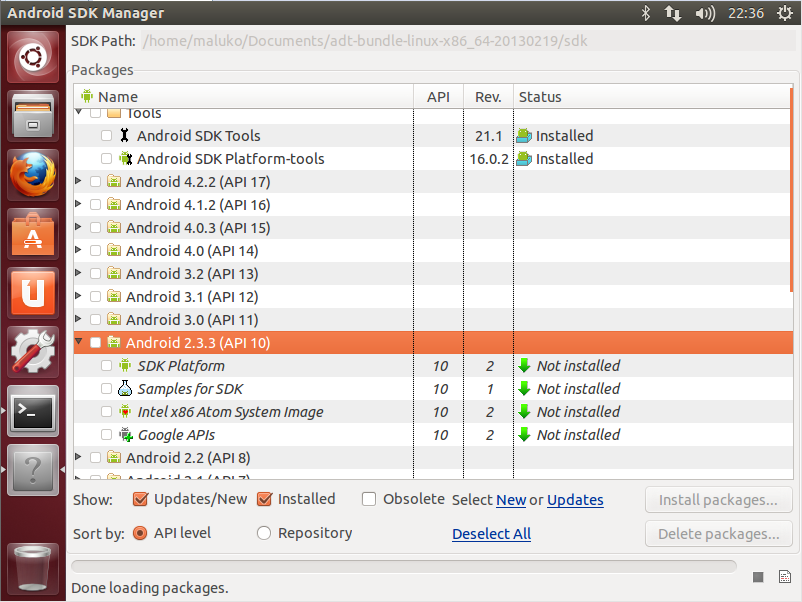
As you can see by the image the Android SDK Tools and the Android SDK Platform-tools are already installed. Now we are going to select the Android 4.2.2 (API 17), this will be the platform that we will be using to emulate, then click on Install accept the licence agreements and wait for it to be installed (You can always change the SDK Platform later).
You will probably get and error at the end of the installation saying:
Stopping ADB server failed (code -1).
Unable to run 'adb': Cannot run program "/home/android/Documents/adt-bundle-linux-x86_64-20130219/sdk/platform-tools/adb": error=2, No such file or directory.
Starting ADB server failed (code -1).
This is because the phones aren’t 64bit, so there is no 64bit version of adb. You need the ia32-libs.
$ sudo apt-get install ia32-libs
After that it all should go smooth.
Optional: We recommend adding the tools/ and platform-tools/ folders to the PATH environment variable (Add the full path to the those folders).
$ sudo nano /etc/environment
So, your PATH should look like:
PATH="/usr/local/sbin:/usr/local/bin:/usr/sbin:/usr/bin:/sbin:/bin:/usr/games:/usr/local/games:/home/maluko/Documents/adt-bundle-linux-x8664-20130219/sdk/platform-tools:/home/maluko/Documents/adt-bundle-linux-x8664-20130219/sdk/tools"
Don’t forget to save the file.
3.3- Setting up Proxy
There are many proxies that can be used, like WebScarab, ZAP or Burp. For our series we are going to use Burp. So, let’s download the program from http://portswigger.net/burp/downloadfree.html.
Download it to a folder of your choosing, once it is done test if it work:
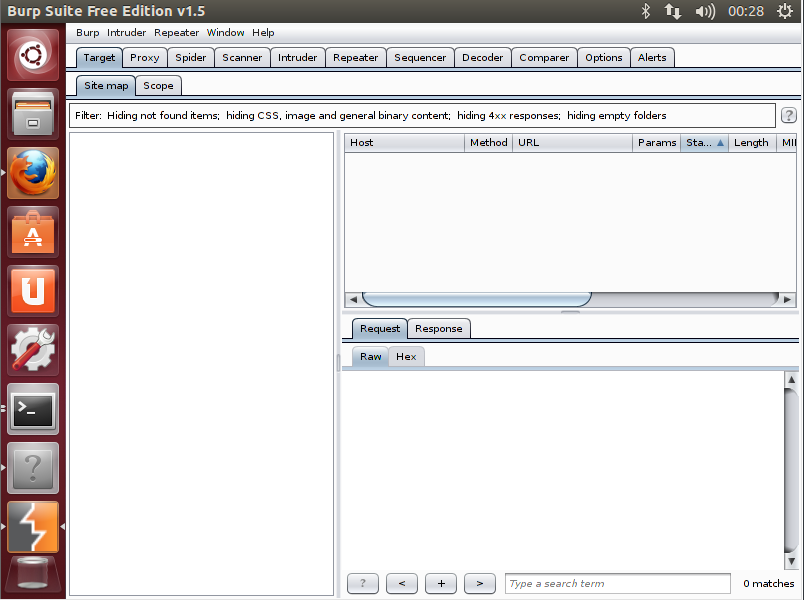
$ java -jar burpsuitefreev1.5.jar
And you should have a window like the following image. If you do, and you got no errors in the terminal then it’s all go to continue.
4. Starting your emulator and configuring your proxy
By now you should have a general knowledge about Android, and have the basic tools to create an Android Virtual Device and connect it through a proxy so that you can see what is going on with the applications installed on that Android. So as we said the first thing to do is create the AVD.
4.1- Create an AVD
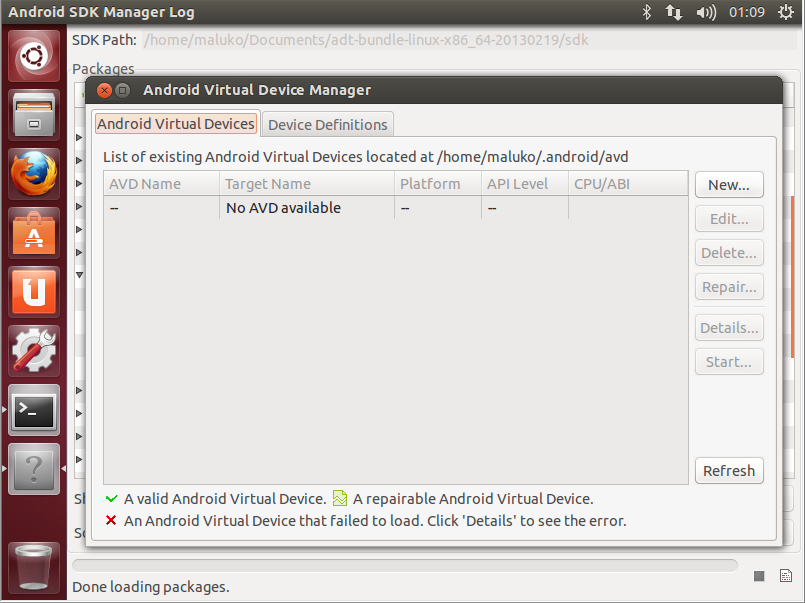
To start up, we need to run the android file (located in the sdk/tools/ directory). This will launch the Android SDK and AVD Manager.
$ ./android
Under “Tools” select “Manage AVDs…” and then press “New…”.
A new window will appear, in this window we are going to fill in the data for the new AVD (this can vary based on personal needs):
- Name: testavd;
- Device: 4.0” WVGA (480 x 800: hdpi);
- Target: Android 4.2.2, API 17;
- CPU/ABI: ARM (armebi-v7a);
- SD Card: Optional (We will leave this blank);
- Snapshot: Checked;
Press OK to finish.
And like that, we have created our first Android Virtual Device. Now, before we start our emulator, we will want to start up our proxy.
4.2- Starting your Proxy
To start with, navigate to the folder that you downloaded your Burp Proxy and run the command.
$ java -jar burpsuitefreev1.5.jar
Within Burp, we have a few configurations that we want to confirm:
- Proxy Listeners:
- Under the option tab “Proxy”, we need to ensure that a proxy listener is running. If we have some network issues with the application, one thing to try is the “support invisible proxying for non-aware clients”. For now, we will leave it unchecked.
- Upstream Proxy Servers:
- If you are working in a corporate environment, you will likely have a proxy server standing between you and the Internet. In that case you will need to go to the “Options” tab, and scroll down to “Upstream Proxy Servers”. Click on “Add” and enter the settings for your proxy server and you should be set.
4.3- Starting your AVD
Previously we created our AVD, but just creating it isn’t enough. We need to start it, and for that we need the following command:
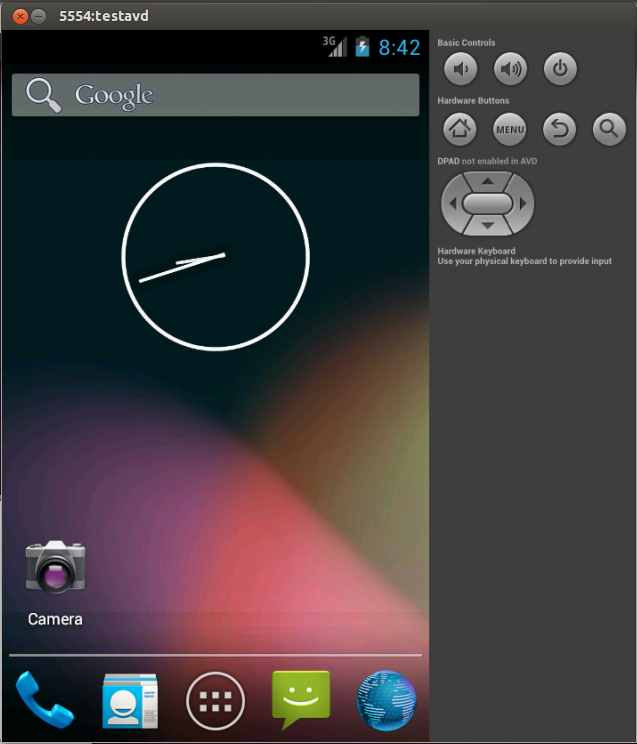
$ emulator -avd testavd -http-proxy http://127.0.0.1:8080
Note: The option -http-proxy http://127.0.0.1:8080 is the setup for using our proxy from within the avd.
After this your AVD should start and look like the following image.
Note: Sometimes it take several minutes to start an AVD, particularly on older systems or VMs with little RAM.
If you find that you are having troubles connecting to the Internet, you can close out of your AVD and reload it, excluding the “-http-proxy http://127.0.0.1:8080” portion of the command. That will help you to determine if your proxy is the cause of your issues.
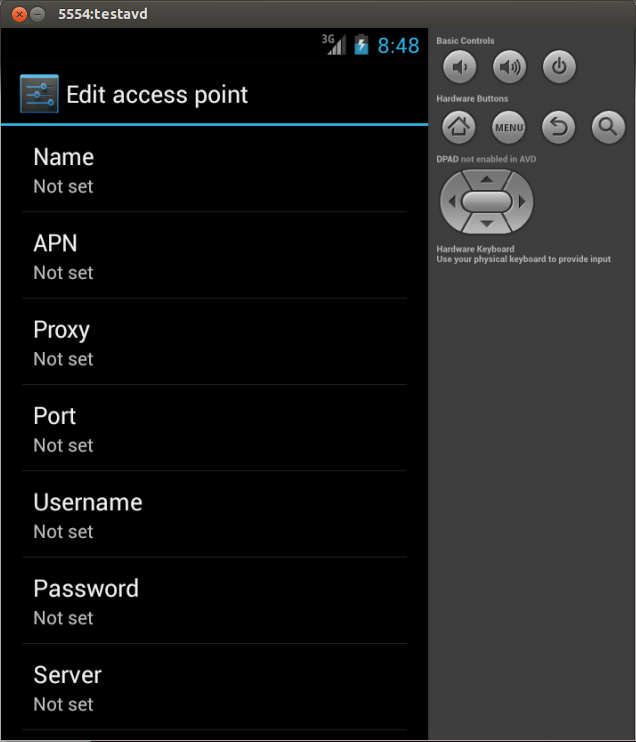
The above method is the most consistent way to get your AVD to recognize Burp proxy. If that does not work, you can always try setting it within the AVD:
Menu > Settings > Wireless & networks > More... > Mobile Networks > Access Point Names.

Menu Button > New APN
Here you can configure the Proxy Settings.
- Name: Internet
- APN: Internet
- Proxy: 127.0.0.1
- Port: 8080
- Username: <N/A>
- Password: <N/A>
There are still a few other ways of setting up the Proxy, but these two are the most reliable.
5. Installing Applications in your emulator
Now that we have an AVD running, the only thing missing is applications to test. If we were using an Android device for testing, it could be as simple as going to the Marketplace, searching the app and press the Install button. But we went through the effort of setting up our testing environment, and the Android emulator cannot download applications directly, so we are going to have to think outside of the box to get it.
5.1- Obtain the Android Application Package File (.apk)
In most situations, we should simply ask our project contact to send us the .apk file. But, if for whatever reason that it’s not an option, don’t get your hopes down. What you should do is:
- Download the application (for our series we will use the IG Learner from Intrepidus Apps) that you want from the marketplace to the physical Android device;
- Download and install a file manager application from the Android Marketplace to the physical Android device. ASTROFileManager is an option;
- Using ASTRO, select Menu > Tools > Application Manager/Backup. Check the box next to the target application, then select Menu > Backup. This will save your .apk as “pkg.apk”, in /mnt/sdcard/backups/apps.
- Mount the Android device as a USB device, and browse to /mnt/sdcard/backups/apps. Copy the “pkg.apk” file to your local hard drive. (you can rename the file for a more helpful understanding).
If for some reason your Android physical device don’t support the application (like mine… sad times…) or you don’t own a device and you would really want to give this application a try there is a light at the end of the tunnel. I’ve found the git repository of this application and with that we are able to compile the code into the .apk file.
5.2- Compile into an Android Application Package File (.apk)
First of, be sure that you have git installed on your machine. If not, you can install it by doing
$ sudo apt-get install git
After it is installed clone the repository to a folder of your choice. So, go to a folder where you can download and do
$ git clone git://github.com/intrepidusgroup/ig-learner.git
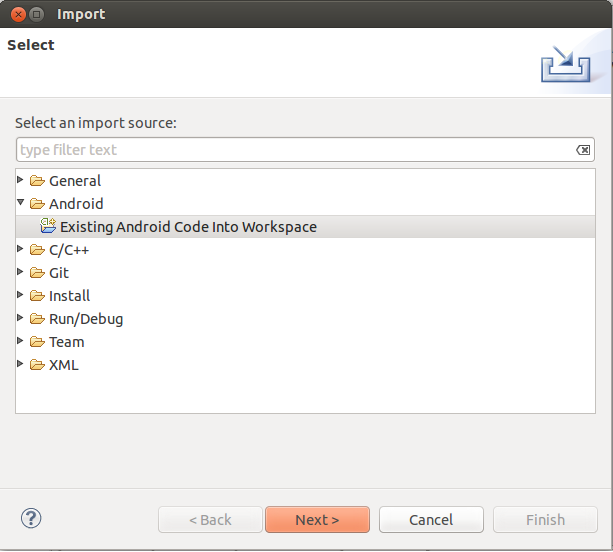
Next run eclipse that is on the eclipse from our Android SDK folder. Go to File > Import…, and select “Existing Android Code Into Workspace” and hit Next.
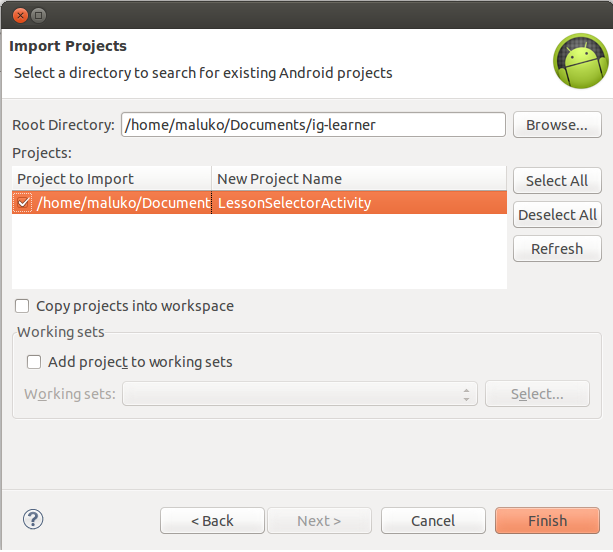
Browse to the cloned folder and select it, make sure it is selected and hit Finish.
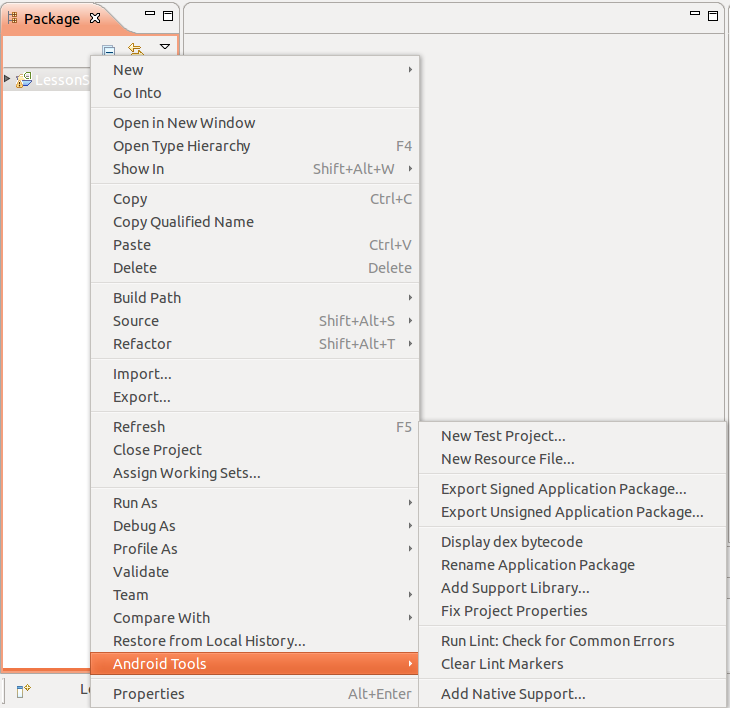
Now we have our source code loaded into eclipse, so the next thing we need to do is to compile it into an .apk file. For that simple right click in the project, browse to Android Tools and select “Export Signed Application Package”. Why do we need to export it as an signed application?
Because the Android system requires that every installed applications be digitally signed with an private key that is maintained by the developer. The Android uses the certificate as a mean to identify the application author and establish an thrust link between applications.
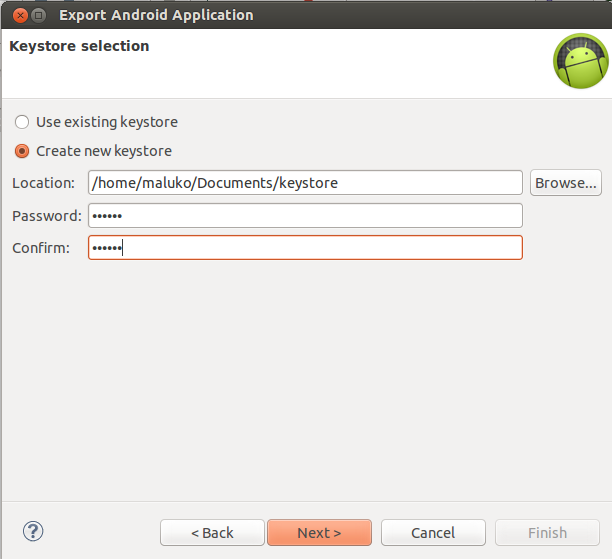
Select the project that you wish to export, in our case it’s “LessonSelectorActivity” and click Next. Now we are asked we want to use an existing keystore or to create one. We still don’t have one so go ahead and create one. Select the location that you want to store it and give it any password that you like and hit Next.
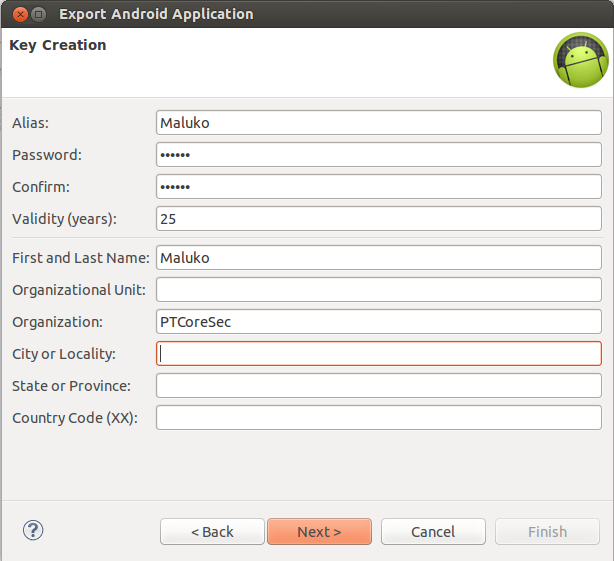
Now you have to fill the fields of the key as you wish. Keep in mind that 25 years is the minimum required to the Validity field. After you are satisfied with your fields click Next.
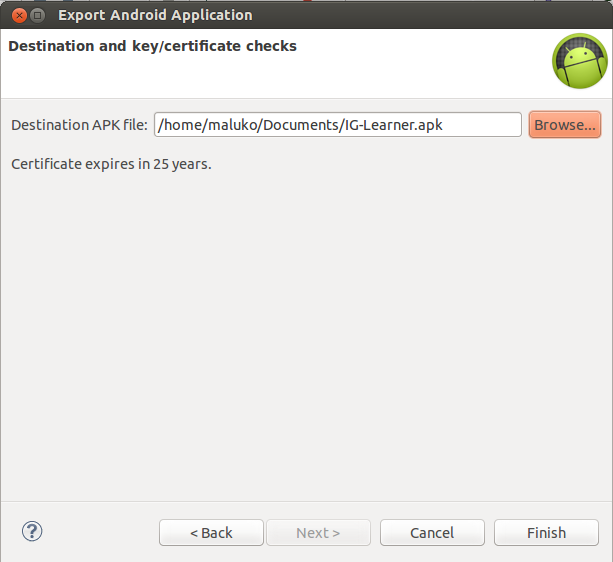
Finally choose the destination folder and name for our .apk file and hit Finish.
Simple right?
5.3- Install the Android Application Package File (.apk)
We now have an .apk to work it, yuppi!! But what should we do with it? Well, the answer is simple. Let’s install it on our AVD device. Be sure to have your device running. To check if your device is running and available you can use
$ adb devices
And get something similar to:

As you can see it recognized our emulator, and to install the .apk you simply need to do:
$ adb install IG-Learner.apk
Note: If for any reason we had more than one AVD running we could target the .apk installation by doing
$ adb -s "emulator-5554" install IG-Learner.apk
If the application is installed successfully you should see the following,

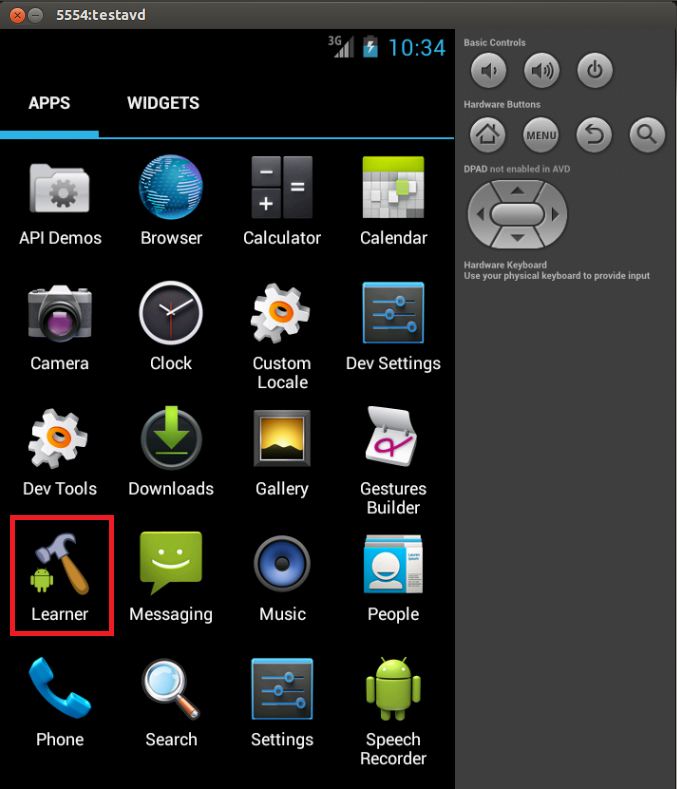
You can also check it in your AVD as we can see. Pretty simple right?
For now in this matter it’s all. Feel free to create other AVDs, install other applications to train what we done in this part 2 of our android series. For the next part we will be talking about methodologies to test these android applications, the OWASP Mobile Security Project and what tools we should know to help in our application tests.
References:
- http://www.symantec.com
- http://resources.infosecinstitute.com
- Mobile Application Security for Dummies
- http://developer.android.com